Cutworms
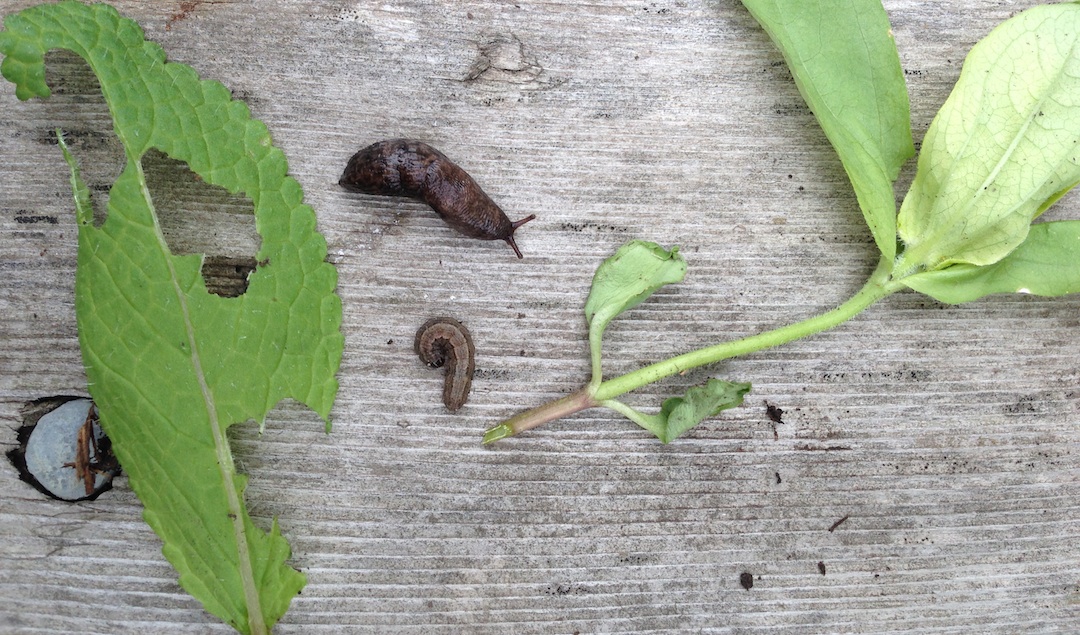
I grew some lovely pink zinnias from seed and planted one out in the garden before the rain. A few days ago, I noticed it was “cut” and lying limp on the ground. With a little careful digging, I found the culprit – a cutworm. The adult cutworm moths lay eggs in August and September. A hot, dry August gives the moths a chance to feed and lay eggs in loose, dry soil surfaces. The eggs hatch in the following May, and also do really well in dry and warm, rather than cool, wet soil.
So if you find a plant with the stem cut off at ground level, gently dig around the stub of the plant and you may find the greyish, caterpillar-like cutworm larva (I squish it). Some pretty good lifecycle info and photos can be found here.
How to Deal with Cutworms
Cut plants can’t be saved, but it’s a good idea to check around your other plants that have not been cut (yet), and install a plastic, cardboard or plastic collar (toilet paper roll, paper cups with bottom cut off, small pop bottle, etc) around the stem, pushing the collar about 2 cm into the ground so that the cutworm can’t get to the stem. Other methods can be found online, such as sprinkling crushed eggshells or diatomaceous earth around the plant. Two nails or toothpicks inserted very closely to the plant stem are also supposed to prevent the cutworm from wrapping around the stem and cutting it. I tend to favour the most direct barrier, a paper collar to be safe.
Cutworms have natural enemies, such as parasitic wasps and ground beetles. It is therefore important to avoid using herbicides or pesticides in the garden and include brush piles, logs and mulch to provide shelter for these beneficial species, as well as native wildflowers as a food source.
Slugs
Yes, I found one, just after the rain. It was going after my newly planted Butterfly Salvia. In a dry year, slugs are not that much of a problem, but we had some wet summers that allowed them to lay eggs and stick around.
When slugs make an appearance, spending a few minutes picking every day works best for me:
I pour about 1 litre of water in a plastic container, add approx. 1 Tbsp of salt and a few drops of dish soap. Then I gently stir the mixture. I put a latex glove on my dominant hand and go out. I gently coax each slug into my cupped hand, then quickly plop it into the salt-water mix. I flush the mix in the toilet.
I have also read that gardeners are having success with corn meal or bran as a slug bait. Apparently, the corn meal or bran kills the slugs because once consumed it swells up in their body. Put some in a jar and lay the jar on its side so the slugs can get in. They’ll eat some, leave, and die. I am planning to try it this year.
Flea Beetles
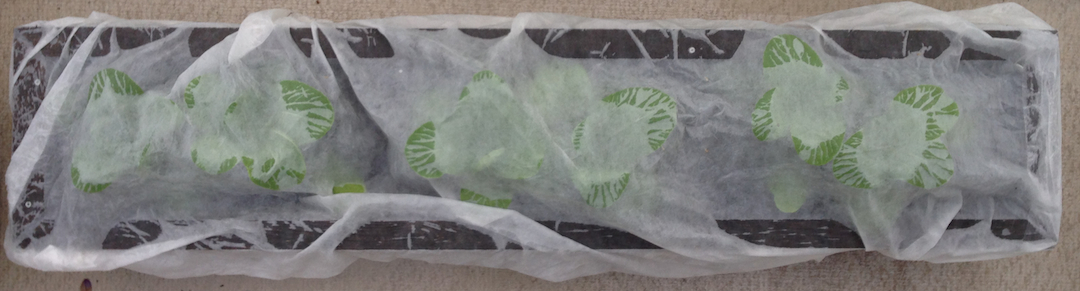
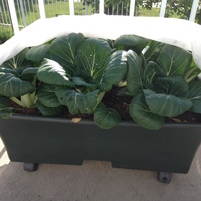
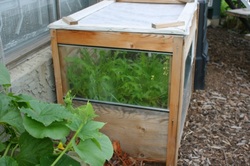
These critters love the mustard family and other plants. I mostly see them feeding on radish, arugula, bok choi, spinach, and potatoes. They are very fast and there are many varieties, therefore control is tricky. Last year, I decided to plant arugula in early August in part shade, and that worked well because the flea beetles are no longer very active. This spring, I planted a cover crop of mustard, and sure enough, the beetles are happy feeding on it. The spinach and early potatoes next to the cover crop have minor damage. I plan on composting the cover crop and lightly tilling the soil to expose any flea beetle eggs, once I plant a zucchini in the bed in the next few days. The most effective way to protect plants from flea beetles is to cover them with floating row cover, available at a local garden centre. My radishes are never wormy under the cover. The attached photo shows bok choi nice and cozy under row cover stapled all around a wooden planter.
I grew some lovely pink zinnias from seed and planted one out in the garden before the rain. A few days ago, I noticed it was “cut” and lying limp on the ground. With a little careful digging, I found the culprit – a cutworm. The adult cutworm moths lay eggs in August and September. A hot, dry August gives the moths a chance to feed and lay eggs in loose, dry soil surfaces. The eggs hatch in the following May, and also do really well in dry and warm, rather than cool, wet soil.
So if you find a plant with the stem cut off at ground level, gently dig around the stub of the plant and you may find the greyish, caterpillar-like cutworm larva (I squish it). Some pretty good lifecycle info and photos can be found here.
How to Deal with Cutworms
Cut plants can’t be saved, but it’s a good idea to check around your other plants that have not been cut (yet), and install a plastic, cardboard or plastic collar (toilet paper roll, paper cups with bottom cut off, small pop bottle, etc) around the stem, pushing the collar about 2 cm into the ground so that the cutworm can’t get to the stem. Other methods can be found online, such as sprinkling crushed eggshells or diatomaceous earth around the plant. Two nails or toothpicks inserted very closely to the plant stem are also supposed to prevent the cutworm from wrapping around the stem and cutting it. I tend to favour the most direct barrier, a paper collar to be safe.
Cutworms have natural enemies, such as parasitic wasps and ground beetles. It is therefore important to avoid using herbicides or pesticides in the garden and include brush piles, logs and mulch to provide shelter for these beneficial species, as well as native wildflowers as a food source.
Slugs
Yes, I found one, just after the rain. It was going after my newly planted Butterfly Salvia. In a dry year, slugs are not that much of a problem, but we had some wet summers that allowed them to lay eggs and stick around.
When slugs make an appearance, spending a few minutes picking every day works best for me:
I pour about 1 litre of water in a plastic container, add approx. 1 Tbsp of salt and a few drops of dish soap. Then I gently stir the mixture. I put a latex glove on my dominant hand and go out. I gently coax each slug into my cupped hand, then quickly plop it into the salt-water mix. I flush the mix in the toilet.
I have also read that gardeners are having success with corn meal or bran as a slug bait. Apparently, the corn meal or bran kills the slugs because once consumed it swells up in their body. Put some in a jar and lay the jar on its side so the slugs can get in. They’ll eat some, leave, and die. I am planning to try it this year.
Flea Beetles
These critters love the mustard family and other plants. I mostly see them feeding on radish, arugula, bok choi, spinach, and potatoes. They are very fast and there are many varieties, therefore control is tricky. Last year, I decided to plant arugula in early August in part shade, and that worked well because the flea beetles are no longer very active. This spring, I planted a cover crop of mustard, and sure enough, the beetles are happy feeding on it. The spinach and early potatoes next to the cover crop have minor damage. I plan on composting the cover crop and lightly tilling the soil to expose any flea beetle eggs, once I plant a zucchini in the bed in the next few days. The most effective way to protect plants from flea beetles is to cover them with floating row cover, available at a local garden centre. My radishes are never wormy under the cover. The attached photo shows bok choi nice and cozy under row cover stapled all around a wooden planter.


 RSS Feed